
8. Guide to Motion Control Simulation
8. Guide to Motion Control Simulation
8.1 Simulation Description
We provide a mujoco-based simulation system for the A2 robot, designed to serve as a testing ground for basic calls to the A2 robot's motion control and action playback interfaces. This serves as a basic validation before actual operation, reducing the risk of damaging the robot while facilitating the debugging of secondary development program logic.
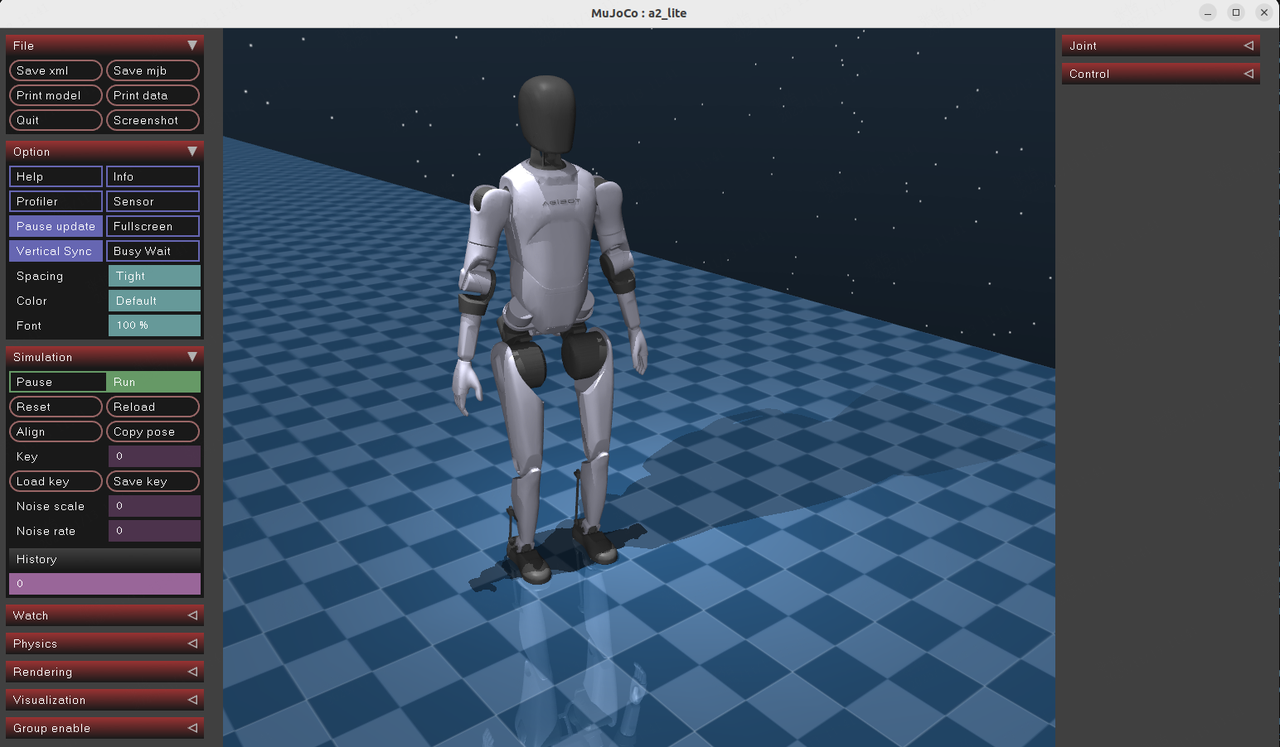
The system runs the mujoco_sim, motion_control, and motion_player components. mujoco_sim acts as the underlying simulation engine, simulating the robot's physical body and hal_ethercat. motion_control interacts with mujoco_sim to exchange control commands and status, thereby controlling the simulated robot. motion_player, on the other hand, calls the high-level interfaces provided by motion_control to play actions. The motion_control and motion_player components are identical to those on the real robot, allowing the system to call all interfaces of the motion control and action playback modules.
8.2 Prerequisites
This simulation system is provided as a container image, containing executable files for each component, action resource files, and calling scripts. To use this simulation system, the following conditions must be met:
- An x86_64 architecture Linux system with Docker installed.
- An X11 desktop system.
- You can check this by running
echo $XDG_SESSION_TYPE, and the expected output should bex11.
- You can check this by running
8.3 Usage Tutorial
8.3.1 Pulling the Image
- Log in to the read-only account of the image repository
docker login tongyong-public-cn-shanghai.cr.volces.com -u crrobot@aima-public-reader -p Aima123456
- Pull the corresponding image
docker pull tongyong-public-cn-shanghai.cr.volces.com/aima-public/a2-lite-simulator:v2.0
8.3.2 Starting the Image
- Allow Docker to access the display, which is used to configure the access control list for the X Window System. Running
xhost +will allow all hosts to connect to the current user's X server, effectively disabling access control for the X server and allowing any user to access and operate it.bashxhost + - Start the Docker containerbash
docker run -it \
--name=a2-lite-sim \
--privileged \
--net=host \
--ipc=host \
--pid=host \
-e DISPLAY=$DISPLAY \
-v /tmp/.X11-unix:/tmp/.X11-unix \
-v /run/dbus/system_bus_socket:/run/dbus/system_bus_socket:ro \
-d tongyong-public-cn-shanghai.cr.volces.com/aima-public/a2-lite-simulator:v2.0
If you find that the simulation interface runs sluggishly on a machine with an NVIDIA graphics card after starting the container with the above command, try using the following command to start the container:bashdocker run -it \ --name=a2-lite-sim \ --gpus all \ --privileged \ --net=host \ --ipc=host \ --pid=host \ -e DISPLAY=$DISPLAY \ -e NVIDIA_VISIBLE_DEVICES=all \ -e NVIDIA_DRIVER_CAPABILITIES=all \ -v /tmp/.X11-unix:/tmp/.X11-unix \ -v /run/dbus/system_bus_socket:/run/dbus/system_bus_socket:ro \ -d tongyong-public-cn-shanghai.cr.volces.com/aima-public/a2-lite-simulator:v2.0
- Enter the containerbash
docker start a2-lite-sim && docker exec -it a2-lite-sim /bin/bash
8.3.3 Starting the Simulation, Motion Control, and Action Playback Modules
- After entering the image, run the following command to start the simulationbash
docker start a2-lite-sim && docker exec -it a2-lite-sim /bin/bash cd /home/agi/a2_simulation/mujoco_sim/bin ./start_a2_lite.sh - In a new window, connect to the container and start the motion control programbash
docker start a2-lite-sim && docker exec -it a2-lite-sim /bin/bash cd /home/agi/a2_simulation/motion_control_lite_2.0.10/scripts/motion_control ./start_motion_control.sh - In another new window, connect to the container and start the action playback programbash
docker start a2-lite-sim && docker exec -it a2-lite-sim /bin/bash

cd /home/agi/a2_simulation/motion_player_lite_2.0.10/scripts/motion_player
./start_motion_player.sh
8.3.4 Controlling Robot Walking
Here, we will use robot walking as an example to explain the basic logic of calling a motion control interface. For other interfaces, refer to the motion control interface documentation and example scripts.
- Open a new window, enter the container, and switch the motion control Action to the joint standing mode (RL_JOINT_DEFAULT)bash
cd /home/agi/a2_simulation/tools-lite/motion_control ./SetAction.py # Select the number corresponding to RL_JOINT_DEFAULT - Click the Load-Key button in the mujoco_sim interface to stabilize the robot
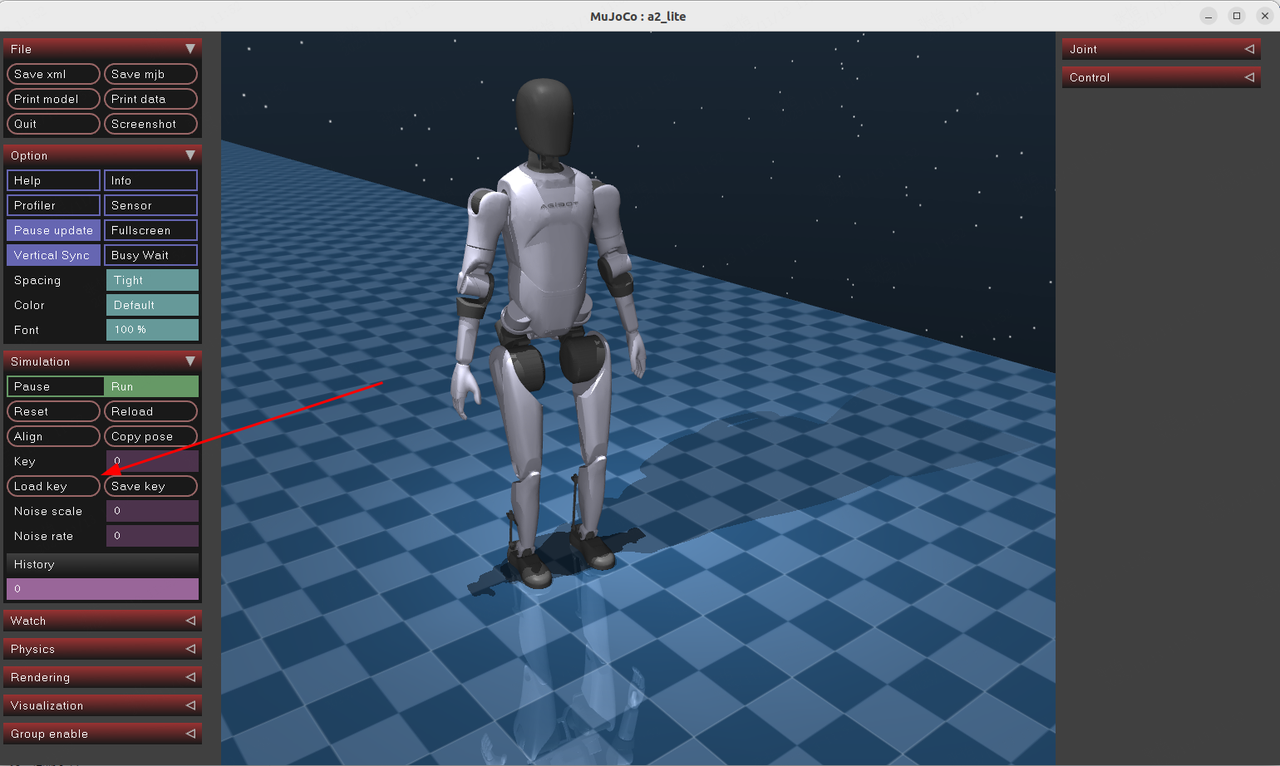
- Continue to switch the motion control Action to the enhanced walking mode (RL_LOCOMOTION_DEFAULT)bash
cd /home/agi/a2_simulation/tools-lite/motion_control ./SetAction.py # Select the number corresponding to RL_LOCOMOTION_DEFAULT - Call the walking example scriptbash
source /home/agi/a2_simulation/prebuilt/ros2_plugin_proto_x86_64/share/ros2_plugin_proto/local_setup.bash
./walk.py
8.3.5 Controlling Robot to Perform Actions
- Switch the motion control state to the enhanced walking upper limb servo mode (RL_LOCOMOTION_ARM_EXT_JOINT_SERVO)bash
cd /home/agi/a2_simulation/tools-lite/motion_control ./SetAction.py # Select the number corresponding to RL_LOCOMOTION_ARM_EXT_JOINT_SERVO - Call the SendMotionCommand interface to perform the actionbash
cd /home/agi/a2_simulation/tools-lite/motion_player
./send_motion_id.sh /agibot/data/resources/default/motion/motion_player/default/双手挥手/双手挥手